Step-by-Step Residential Well Drilling: From Site Survey to Water Flow
Buying land or a home outside city water in Sandy, Boring, Damascus, or Estacada means one question comes before everything else: can this property give you water? This guide walks through the well drilling process steps, from the first site walk to the day water runs from the tap, so you know what actually happens, what it costs, and where projects go sideways. No vague "it depends" answers. Just the real sequence, in order, the way a driller would explain it over the phone.
If you are under contract on a rural parcel with no existing well, or evaluating a property where the seller's well disclosure raised more questions than it answered, this is the process you are signing up for. Knowing the steps helps you ask the right questions before you close, not after.
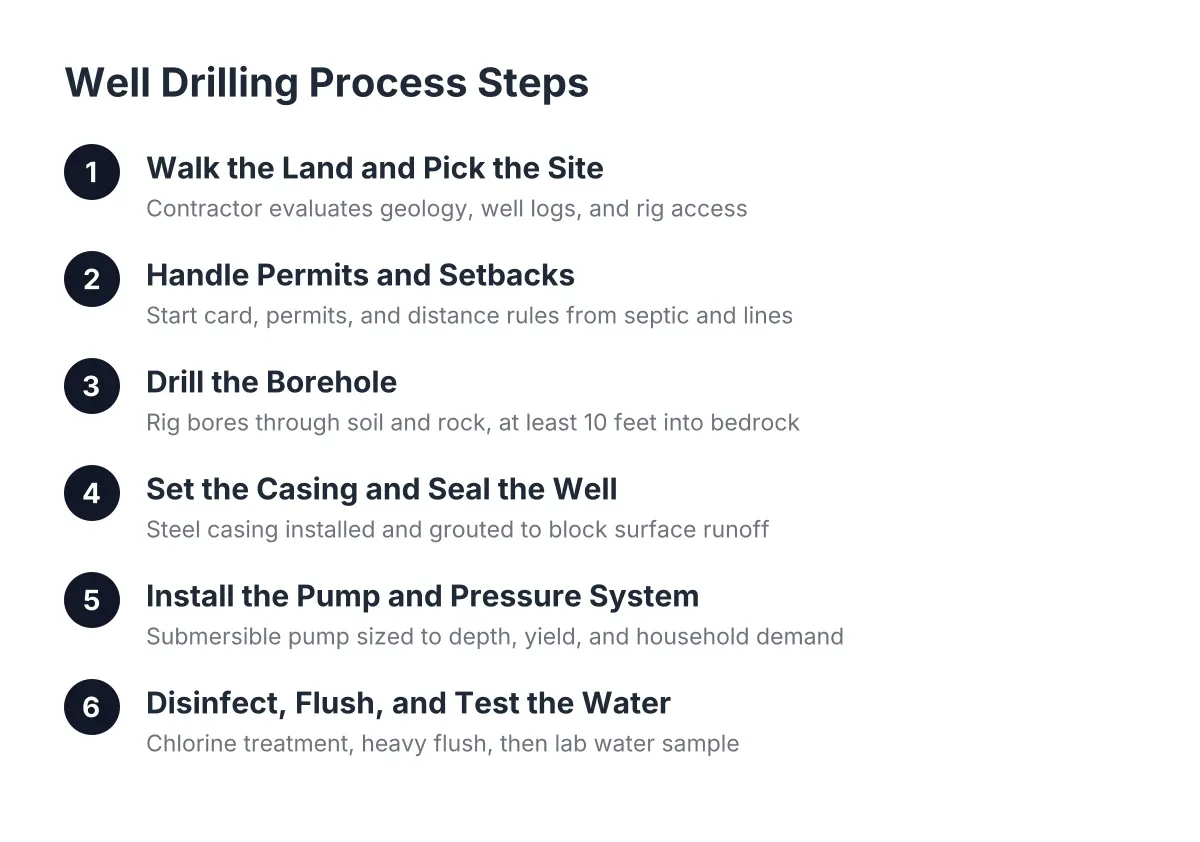
Step 1: Walk the Land and Pick the Drilling Site
First, someone has to decide where the hole goes. Before any rig shows up, a well contractor or hydrogeologist evaluates the property: the lay of the land, what nearby wells have produced, distances from the septic system and property lines, and where a drilling rig can physically park and work.
This step matters more than most buyers realize. Groundwater in the east Portland metro does not sit in a neat, even layer. Two properties a half mile apart in Corbett or Estacada can hit water at different depths because the geology underneath them differs. Nearby well logs are public record in Oregon, and a good contractor will pull logs from surrounding parcels to build a realistic picture of what your ground likely holds.
If you are still deciding whether to buy the land, this is also where a test well conversation happens. Drilling a test well before committing to house construction tells you how much of your budget water access will eat before you pour a foundation. It is not cheap, but it beats finding out after framing that the aquifer under your lot runs deep.
Step 2: Handle Permits and Setback Requirements
Oregon requires a start card and permit paperwork before a new residential well is drilled, and the well must meet setback rules from septic drainfields, sewer lines, and property boundaries. Your licensed well drilling company handles most of this, but as the property owner or buyer, you should confirm it is being done.
In addition, if you are inspecting a property before purchase, ask for the existing well log and any permit records. A well with no log on file, or one drilled before modern standards, is a flag worth raising during your inspection contingency window. That is exactly the kind of documented answer a pre-purchase well inspection is supposed to give you.
Step 3: Drill the Borehole
Next comes the part everyone pictures: the rig. A typical crew of a few workers sets up a standard drilling rig and begins boring down through topsoil, clay, gravel, and eventually rock. The rig hammers or rotates through each layer, and the crew reads the cuttings coming up to track what formation they are in.
When the drill passes through the loose overburden and hits the top of bedrock, drillers plan to go at least about 10 feet into that rock, according to the New Hampshire Department of Environmental Services. That socket keeps dirty surface water out of your drinking water and gives the casing a solid seat.
Hitting water does not mean the job stops. Crews often keep drilling past the first water-bearing zone for two reasons: to confirm the flow holds steady rather than trickling out, and to add depth that gives sediment room to settle and leaves reserve capacity for dry summers.
Step 4: Set the Casing and Seal the Well
Once the borehole reaches its target depth, the crew installs steel casing, a pipe that lines the upper portion of the hole and keeps the walls from collapsing. The space between the casing and the earth gets sealed with grout, usually a cement or bentonite mixture, so surface runoff cannot slip down alongside the pipe into your aquifer.
Grouting often happens the same day drilling wraps up, especially when an inspector is expected on site. This seal is one of the biggest differences between a properly built water well and an old, shallow well that fails a pre-purchase well inspection decades later.
Step 5: Install the Pump and Pressure System
A drilled hole is not a working well until the pump system goes in. Residential well systems typically pair a submersible pump, set down inside the well, with a pressure tank that may sit in the well, the house, or a crawl space depending on the layout, according to the Indiana Department of Health.
The pump size gets matched to the well's depth and yield, plus the household's demand. Oversizing or undersizing a pump is a common cause of early failure and later well pump repair calls. For buyers inspecting an existing well, the pump's age and sizing are two of the most useful things a well and pump inspection report can tell you, since pump replacement is usually the first major expense a new owner faces.
Step 6: Disinfect, Flush, and Test the Water
After installation, the driller disinfects the well and pump components with chlorine or bleach, and the well should be run heavily afterward to flush the chemical taste and residue out before regular use, according to the San Diego County Department of Environmental Health.
Then comes the step that puts the well into service: water testing. It is standard practice to run the well extensively first, so the sample reflects normal water quality rather than lingering disinfectant, according to the CDC. The sample goes to a lab, and the results are the final gate before the well is considered ready. For anyone buying a home on well water, this same kind of lab test is what you should demand before closing, whether the well is brand new or forty years old.
What the Well Drilling Process Steps Cost in Real Numbers
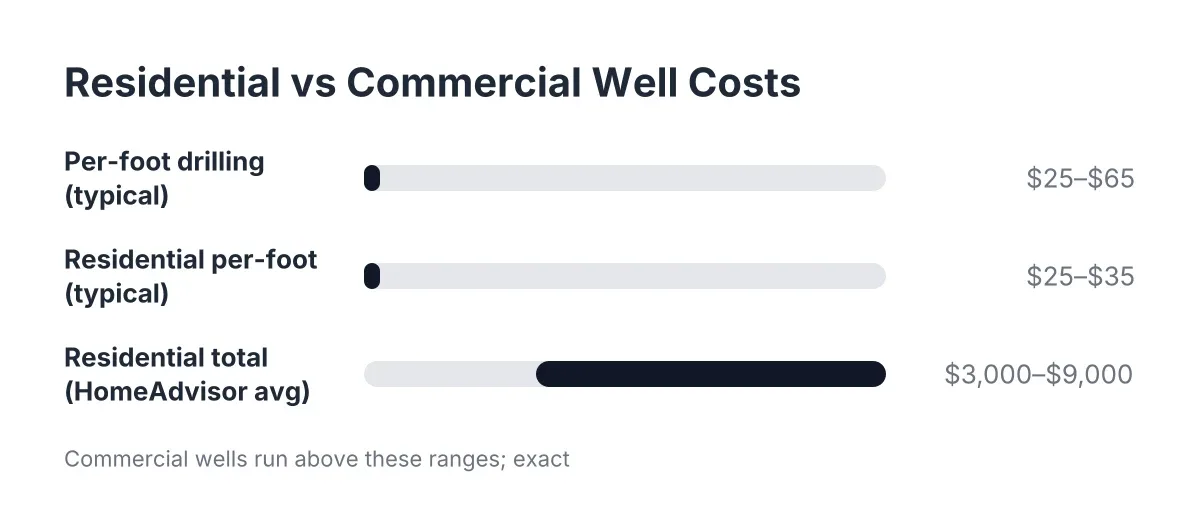
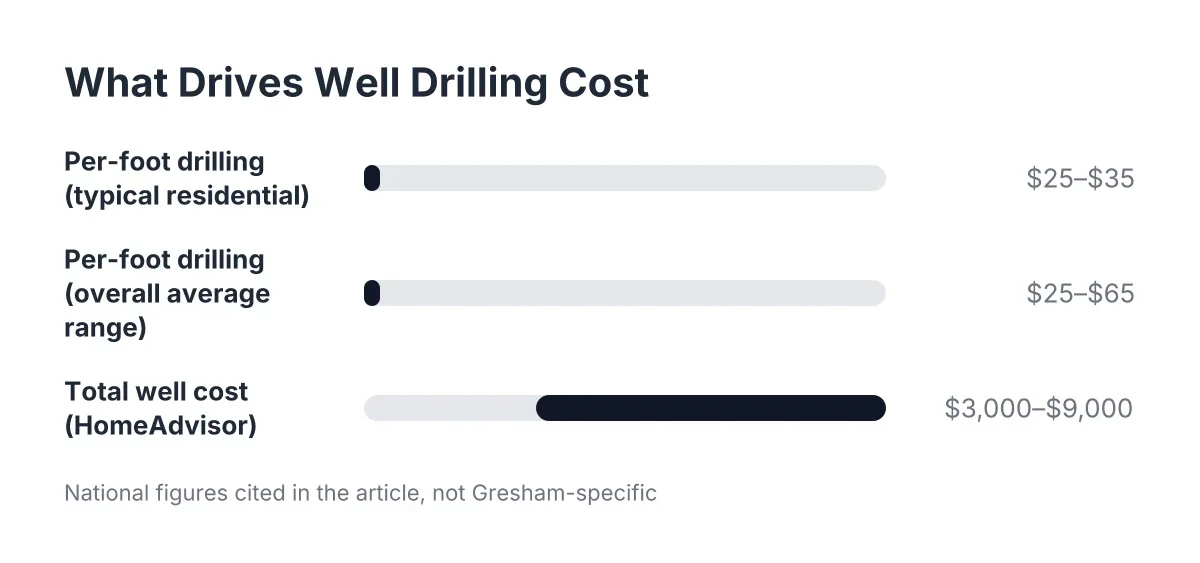
The cost of drilling a residential well is driven mostly by depth, and depth is driven by geology you cannot see from the surface. National figures give a useful floor: homeowners spend an average of $3,000 to $9,000 to drill a well, with an average price of $5,500, according to HomeAdvisor. Per-foot pricing typically runs $25 to $65, according to Angi.
However, treat national averages and any well drilling cost calculator as a starting point, not a quote. Around Gresham and the rural Clackamas and Multnomah County edge, total water well installation cost for a complete new well installation, including drilling, casing, pump, pressure tank, and testing, commonly lands well above the bare drilling figure. What moves the number:
- Depth to water. Every additional foot of drilling and casing adds cost, and deeper aquifers mean bigger pumps.
- Rock versus soil. Drilling through basalt is slower and harder on equipment than drilling through gravel and clay.
- Access. A rig needs room. Steep or wooded lots in the Corbett and Estacada hills can add setup time.
- Pump and pressure system. Deeper wells need more powerful submersible pumps and heavier wire runs.
- Yield problems. A low-producing well may need extra depth or follow-up work, which stretches both budget and timeline.
For example, suppose a buyer closes on a two-acre parcel outside Sandy with no existing well. In that scenario, a realistic plan budgets for the full system, not just the borehole, and leaves headroom in case the drill has to go deeper than the neighboring well logs suggested. As of 2026, that headroom is the single best piece of financial advice anyone can give you about well drilling cost.
How Long the Process Takes
The drilling itself often takes only a few days. The full project rarely does. Permitting, scheduling the rig, waiting on lab results, and any follow-up work such as hydrofracturing a low-yield well can stretch the timeline to weeks or occasionally months from first site visit to normal water use.
Therefore, if you are building new construction, get the well drilled early in the project. Water on site changes everything downstream, from concrete work to lender requirements, and a slow well timeline should never be the thing holding up your build.
Why the Well Drilling Process Steps Matter to Buyers
If you are evaluating a property with an existing water well, every step above becomes an inspection question. Was the casing sealed properly? Is there a well log? How old is the pump, and was it sized right? Has the water been lab tested recently? A documented well inspection answers those questions in writing, and according to Angi, a typical professional well inspection costs $250 to $550, small money against the price of a home.
You are not alone in relying on this. More than 43 million Americans depend on private wells for their drinking water, according to the National Ground Water Association. A well is not exotic; it is just infrastructure that deserves the same scrutiny you would give a roof or a foundation.
One honest limitation: no article, and no neighbor's well log, can tell you exactly what is under your specific lot. Geology varies parcel to parcel, and the only certain answer comes from the drill itself. That is why walking through the process with a local well drilling company before you commit, whether to a land purchase or a build, is the step that protects all the others.
If you need well drilling, Clackamas Well Drilling can help.
Prefer to talk it through? Call (503) 782-5215 — a quick call is usually the fastest way to get a straight answer for your situation.