Well Pump Won’t Prime? Step-by-Step Fixes to Restore Your Water Flow
If your well pump won't prime, you are probably standing at a dry faucet wondering whether you can fix this yourself or whether it is time to call for well pump repair. When a well pump is losing prime, most priming problems come down to a handful of causes, and you can check for several of them before anyone shows up in your driveway. This guide walks you through the process step by step, the same order a pump technician would follow, so you can either restore water yourself or describe the problem accurately when you call.
One thing to know up front: priming only applies to above-ground pumps. Jet pumps and shallow well pumps sit above the water and pull it up through a suction line. They need to be full of water to work. Submersible pumps sit down in the well underwater, so a "submersible pump won't prime" situation is actually a different problem, usually electrical or mechanical, and we will cover how to tell the difference below.
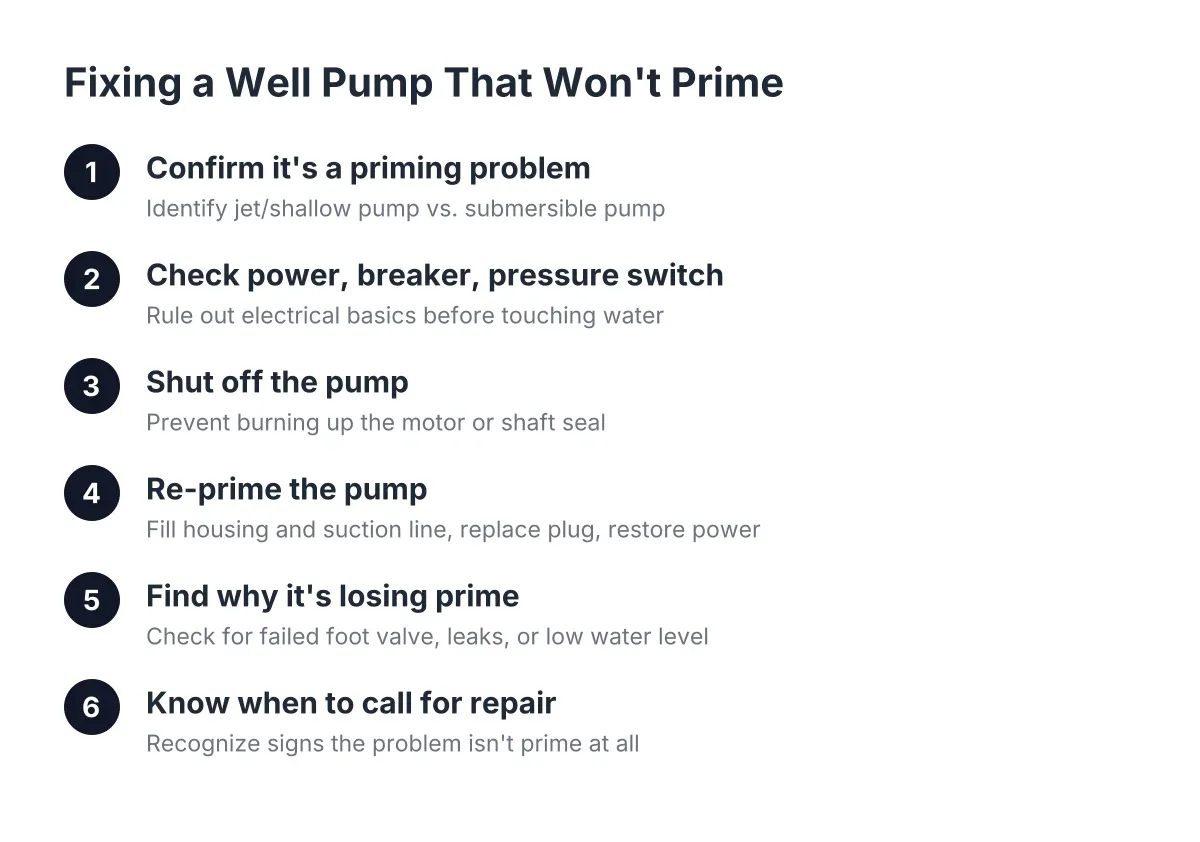
Step 1: Confirm You Actually Have a Priming Problem
First, figure out which kind of pump you have. Walk to your pressure tank, which is usually in the garage, basement, crawl space, or a small well house. If there is a motor bolted to a pump body right next to the tank, with a pipe running toward the well, you have a jet pump or shallow well pump. That is the kind that can lose prime.
If all you see is a pressure tank and wiring heading out to the well cap, your pump is submersible. According to the Indiana Department of Health, residential well systems typically pair a submersible pump with a pressure tank that may sit in the well, the house, or a crawl space. A submersible pump cannot lose prime in the normal sense because it lives underwater. If a submersible well pump won't push water, skip to Step 6, because pouring water into your plumbing will not help.
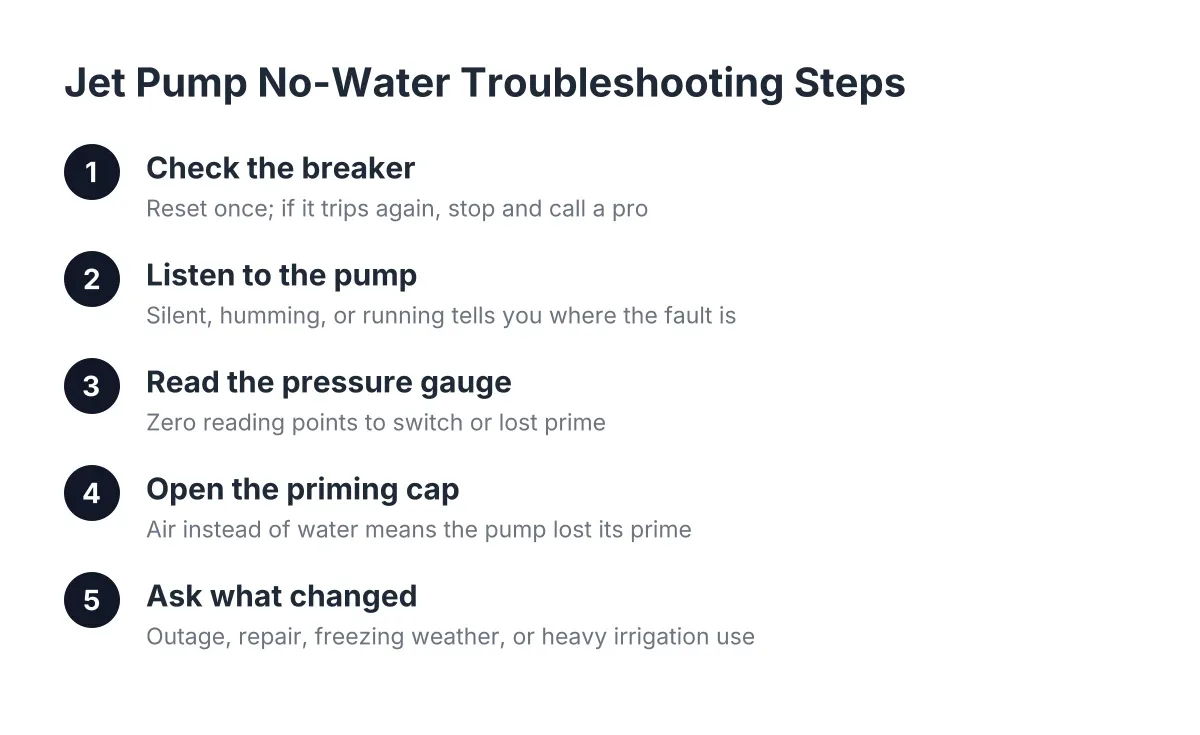
A classic priming symptom looks like this: the well pump is running but no water comes out, the motor sounds normal or slightly high-pitched, and the pressure gauge never climbs. The pump is spinning air instead of water.
Step 2: Check Power, the Breaker, and the Pressure Switch
Before you touch any water, rule out the electrical basics. A pump that will not start at all is a different problem than a pump that runs but moves no water.
Work through this list:
- Check the breaker panel for a tripped or half-tripped breaker on the well circuit. Reset it once. If it trips again, stop; a well pump tripping the breaker repeatedly points to a failing motor or a wiring fault, and that is professional territory.
- Look at the pressure switch, the small gray or black box near the pressure tank with wires running into it. Basic water pump pressure switch troubleshooting starts here: with the power off, check that the contacts are not burned or pitted and that ants or debris have not fouled the mechanism.
- Confirm the pump hums or runs when it should. Silence with good power usually means a switch or motor problem, not a prime problem.
If the pump has power and runs but delivers nothing, you likely do have a prime issue. Move to Step 3.
Step 3: Shut Off the Pump Before It Burns Up
Turn the pump off at the breaker now. This matters more than any other step. A pump running dry has no water moving through it to cool and lubricate the seals. Let it keep spinning air and you can burn up the motor or destroy the shaft seal, turning a free fix into a full well pump replacement. For reference, Angi puts the national average well pump replacement cost at $1,898, with most homeowners paying between $975 and $2,821. Ten minutes of running dry can be the difference between pouring in a bucket of water and writing that check.
Step 4: Re-Prime the Pump the Right Way
With the power off, you are ready to re-prime. You will need clean water, a bucket or a garden hose from a neighbor, and a wrench for the priming plug.
- Find the priming port on top of the pump body. It is a square-headed plug or a cap, usually near where the pipe from the well enters the pump.
- Remove the plug and pour clean water in slowly. You are trying to flood the pump housing and the suction line all the way back to the water source, so this can take more water than you expect.
- Keep pouring until the water level rises to the top of the port and holds steady. If the level keeps dropping, add more; if it never holds, note that, because it matters in Step 5.
- Replace the plug snugly, open a faucet inside the house to give trapped air somewhere to go, and turn the power back on.
- Watch the pressure gauge. Sputtering, spitting, and coughing at the faucet is normal at first. Steady pressure building on the gauge means the pump has caught its prime.
Do not panic if it does not catch on the first try. A jet pump often needs two or three rounds of priming before it fully catches and holds suction; that is a normal part of the restart, not a sign of failure. If it catches, let the pump run a few minutes and watch for sand or sediment flushing through before you trust the water again.
Step 5: Why Your Well Pump Is Losing Prime and What to Do
Here is a direct answer to the most common follow-up question: a well pump won't stay primed when air is getting into the suction side or water is draining back down the well. The usual suspects are a failed foot valve or check valve, a suction line leak, a bad shaft seal, or a water level that has dropped below the pump's reach.
Work through the causes in order of likelihood:
- Failed check valve or foot valve. The foot valve at the bottom of the suction line is a one-way door that keeps the line full when the pump shuts off. When it fails, water drains back into the well and the pump wakes up dry. If your pump primes fine, runs, then loses pressure overnight with no leak anywhere in the house, this is the classic cause. A well pump that runs then loses pressure with no visible leak almost always has a leak below ground or a valve leaking backward.
- Suction line air leak. During Step 4, if the water level in the priming port kept dropping no matter how much you poured, water is escaping or air is entering somewhere in the suction line. A cracked fitting, a loose union, or a corroded pipe will do it. These leaks are often invisible because the line runs underground.
- Low water level in the well. Sometimes the pump is fine and the well itself is the problem. Oregon wells do go dry; the U.S. Geological Survey reports that about 1,220 domestic wells in Oregon went dry or fell below pumping capacity between June 2021 and December 2023, and the real number is likely higher. If your well pump wont prime in late summer after weeks of heavy use, and the neighbors on the same aquifer are seeing pressure drops too, the groundwater level may have fallen below what a shallow well pump can lift.
- Sudden sediment in the water. If the water that does come through is suddenly sandy or cloudy, the well may be pulling from near the bottom, another sign of a dropping water level or a failing well screen.
For example, suppose a homeowner in Boring wakes up to dry taps after a windstorm knocked out power overnight. The pump lost prime when the power cut out mid-cycle, and one bucket of water through the priming port fixes it in twenty minutes. Now suppose the same pump loses prime again two days later, then again the next morning. In that scenario the storm was a coincidence; the foot valve is failing, and each outage will get closer together until it is replaced.
Step 6: Know When the Problem Is Not Prime at All
A deep well with a submersible pump cannot be primed from the surface, so "deep well pump won't prime" searches usually mean something else has failed. A submersible pump that runs but delivers no water may have a broken drop pipe, a failed check valve down the well, a worn impeller, or a water level below the pump intake. None of those are homeowner fixes, because the pump has to come up out of the well.
Likewise, if a brand new well pump won't prime after installation, the pump itself is rarely the problem. The suction line may have an air leak at a new fitting, the foot valve may be installed backward, or the line may simply need several rounds of priming to fully flood. Patience and a careful check of every new joint solve most of these.
When to Stop and Call for Well Pump Repair
Call a professional when the pump trips the breaker more than once, when it will not hold prime after two or three careful attempts, or when you suspect the underground line or the well itself. At that point, more DIY attempts risk damaging the motor or masking the real fault. Honest well pump troubleshooting by a technician usually starts at the pressure tank and works backward, so everything you learned above lets you skip the guesswork and describe exactly what you found: pump runs but no water, prime will not hold overnight, level drops in the priming port. That description alone can shorten the visit.
Around Gresham and the rural edge of Multnomah and Clackamas County, in places like Sandy, Damascus, Estacada, and Corbett, many homes sit on wells that are decades old. Aging foot valves, corroded suction lines, and seasonal groundwater swings are the normal wear items on those systems. A pump and well repair visit for a valve or line fix is a far smaller job than well drilling, and knowing which one you are facing before you pick up the phone is exactly the point of working through these steps first. If the well itself is in question, a well inspection with a water level check will tell you whether the pump or the aquifer is the real story.
If you need well drilling, Clackamas Well Drilling can help.
Prefer to talk it through? Call (503) 782-5215 — a quick call is usually the fastest way to get a straight answer for your situation.